· 6 min read
The Negative as Score: Adams, Print Values, and the Logic of Dodging and Burning
How Ansel Adams treated the negative as a fixed score and the print as performance, holding back and burning in to realize a visualized tonal scale.
Written in by Simon Lehmann Editor
Some negatives carry so much density in the highlights that no amount of burning will coax tone out of them, and the reason is worth being precise about. A dense highlight on the negative blocks so much light that even a long burn delivers an image exposure which still lands below the paper’s threshold. More seconds of the same feeble light do not change which part of the curve that light falls on. The brightest values print as bare paper white, the transition into them is abrupt rather than gradual, and the cure is not more exposure but a different one. Pre-flashing supplies it: a brief, even, image-free exposure given to the paper before or after the main printing exposure, set just below the level that would register any visible density on its own. The flash does nothing where the paper already receives strong image light, but in the faintest highlights it supplies the small additional exposure needed to lift them over threshold.
Before reaching for the flash, confirm the problem is not simply the wrong grade. Variable-contrast papers are characterised by an ISO Range figure, R, defined under ISO 6846:1992 as the negative density range the grade is built to print across a full tonal scale, expressed as that log-exposure range multiplied by one hundred. Ilford’s Multigrade IV RC Deluxe datasheet lists, by grade, R values of 180 (00), 160 (0), 130 (1), 110 (2), 90 (3), 60 (4) and 40 (5), with 110 when printed filterless. The selection rule is direct: measure the negative’s effective density range, multiply by a hundred, and choose the nearest R. A negative spanning 1.32 log-exposure units gives 132, nearest to 130, so it prints at grade 1.
The case for flashing appears when the negative’s range exceeds even the softest grade. A range of 1.40 yields R140, and grade 1 at R130 cannot hold it; dropping to grade 00 at R180 buys range but at the cost of muddy, contrastless midtones. When no available grade will accommodate the highlights, lowering the paper’s threshold with a flash is the remedy. Flashing also softens highlights without touching the contrast filter, which matters in practice because Ilford notes that exposure time is roughly constant from filter 00 to 3.5 and approximately doubles from filter 4 to 5; a flash sidesteps that step change.
Exposure is governed by H = E x t, exposure equalling illuminance times time, and within reciprocity the flash and the image exposure simply add as quantities of light energy reaching each point of the paper. That additivity is the whole mechanism. On the steep straight-line section of the characteristic curve, where the midtones already sit high up, a tiny added increment shifts the result imperceptibly. At the toe, the same increment is the difference between bare paper and the first recorded density.
Photographic paper’s curve runs from D-min, the slight inherent density of base plus fog that reflects under a full white, through the toe where low exposure yields little density, up the straight line that gives maximum tonal separation, to D-max, the deepest black beyond which more light does nothing. A delicate highlight fails because its image exposure lands in the dead toe, short of the inertia point. The flash does not lengthen the toe; it shifts the paper’s operating point up to near inertia, so the faintest image exposures now arrive on the rising portion of the curve rather than in the flat foot. Set the flash one step below the first visible tone and the highlights ride just over the threshold while the midtones, already on the steep section, are left unmoved.
Calibrate with no negative in the carrier, projecting even light across a sheet of the working paper. A common arrangement closes the lens to a small aperture such as f/16, which keeps the required time long enough to meter in distinct steps; opening up to f/8 or raising the head shortens it past the point where seconds can be read apart. Expose a test strip in timed increments, develop it normally, and read it under a loupe. As a concrete reference point, “normally” means Ilford Multigrade developer at 1+9 for one minute at 20C/68F; the same datasheet also gives 1+14 for 1:30, PQ Universal 1+9 for 2:00, and Bromophen 1+3 for 2:00.
Les McLean’s procedure is the model. Working in two-second increments, the first visible tone appeared at 4 seconds, so he set the working pre-flash to 3 seconds, one step before any density registers on its own. His print Branches and Grasses, on Oriental Seagull VC at grade 3.5, took that 3-second pre-flash followed by an 8-second image exposure, and the leaf highlights held their delicate detail that bare paper would have lost. Note the consequence you will see at the easel: once the paper is carried past inertia, all the light through the negative contributes to tone rather than overcoming threshold, so the required image exposure drops, in some cases by around twenty per cent.
The flash can come before or after the main exposure, and the two serve different ends. A pre-flash treats the whole sheet uniformly, lowering the threshold everywhere before the image is printed. Post-flashing, or post-fogging, lets you fog only selected areas after the main exposure, applied through burning so that the extra even light reaches just the brightest highlights. McLean’s Old House Bodie, on Ilford Warmtone VC at grade 4, took a 3-second pre-flash and then, after the image exposure, a 9-second post-fog over the whole print followed by a further 20 seconds of selective post-fogging on the brightest highlights, 32 seconds of white light in total on those passages alone. Choose the pre-flash when the whole print’s highlights are at risk; choose post-fogging when only a few small areas blow out and the rest of the print is fine as printed.
Pre-flashing trades contrast for highlight detail, and overdone it flattens a print until it loses all punch. The lowered toe costs you some bite, so a sensible response is to push the contrast back up by one or two grades after flashing to recover the punch; Darkroom Dave’s tutorial recommends exactly that. His calibration mirrors McLean’s: remove the negative, close to f/16, step a test strip, process normally, find the just-visible step under a magnifier, and set the working flash one or two steps shorter so it deposits nothing on its own. Do not combine flashing with split-grade printing, since the soft-grade exposure and the flash both add low-contrast light and compound into excessively flat results. And recalibrate whenever the paper, developer, or enlarger height changes, because each shifts the inertia point and with it the flash time you need.
Ansel Adams described the inverse operation in The Negative (The New Ansel Adams Photography Series, Book 2, 1981): a faint, image-free pre-exposure to the film, calibrated to place shadow detail around the low zones, around Zone I to II, without affecting the highlights, because the added exposure is significant only where image exposure is already minimal. Paper pre-flashing applies the identical additive, sub-threshold principle, but at the opposite end of the tonal scale, lifting highlights rather than shadows.
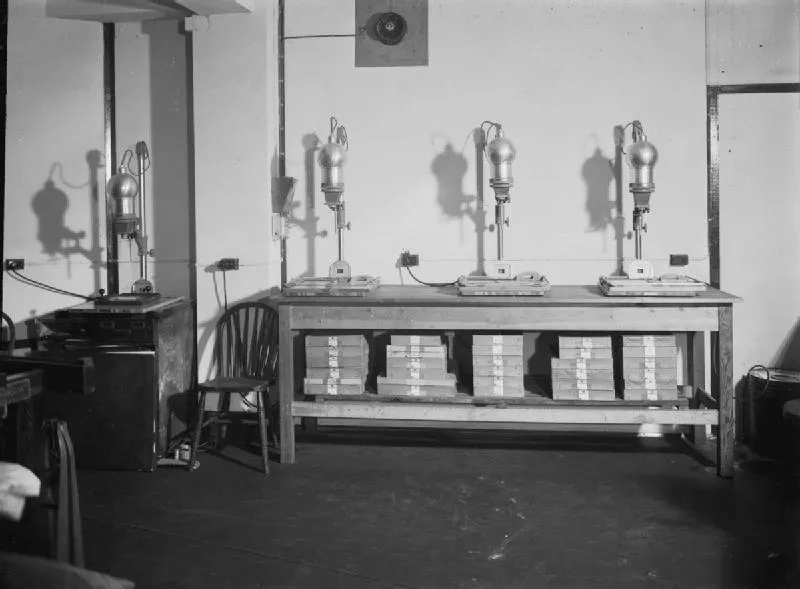
Image: War Office official photographer, Kodak precision enlargers in the darkroom of the War Office Photographic Section, Curzon Street, London (1939-1945), Imperial War Museum via Wikimedia Commons, Crown copyright expired (PD-UKGov)
· 6 min read
How Ansel Adams treated the negative as a fixed score and the print as performance, holding back and burning in to realize a visualized tonal scale.
· 6 min read
How and when to bracket exposures by full and fractional stops, how to set the spread for film versus digital, and when brackets serve as insurance or as blending source frames.
· 9 min read
How fixed-grade and variable-contrast papers reshape a negative's tonal range, and how enlarger filtration sets contrast under the lens.
The grainmag companion app
Meter and place your tones without a signal. No account, no internet required — just you, the light, and the grain.